
Planting on my chilli seedlings

FREE Step-by-step guide on Planting on my seedlings.
In this tutorial we will be showing you how to plant on your seedlings. It is a good idea to read our FREE step-by-step guide on making up a basic Potting Medium Mix. We will be using this Potting Medium Mix as our medium in this tutorial.
What you will need
There are a couple of things you will need to organise to follow this demonstration:
- Containers (Grow Bags or Pots, 1 litre - 25 litre your choice)
- Potting Medium Mix
- TurboGrow Volcanic Rock Dust
- Atlantic BioOcean pellets
- Talborne Seedling Food
- Water - preferably rain water or borehole water
- Watering can or sprayer
Planting on your Seedlings
In this tutorial we will show you how we plant on our seedlings. This is how we do it. There may be other methods or techniques, this works for us.
Rules:
Let's start with some basic housekeeping and rules first.
- Wash your hands before you start. Yes, gardening is a dirty hobby and washing hands seems quite ridiculous, but there are a number of valid reasons. Chillies are very susceptible to infections. Bacterial and Viral infections can be transferred from infected plants via your hands to your chillies. Once infected it is terminal. Also, if you are a smoker, Tobacco Mosaic Virus can be transmitted from the Tobacco in your cigarettes to your chillies - and its terminal. So please wash your hands before handling your plants.
- Patience is a virtue. Mother nature works in her own time. You can not rush mother nature. Take a chilli pill and enjoy the journey!
- More is not more. In fact more usually ends with less! If you think you are going to be the first gardener in history to grow monster plants and chillies by throwing the entire catalogue of nutrients and fertilizers at your plants - you are not! Many growers before you have made this mistake and ended up with dead plants. Again, this is mother nature and not a chemistry experiment. Ignore that voice in your head that says "add more". Throwing chemicals at plants is not the answer!
We usually plant our seedlings on to 1 litre or 2 litre grow bags. These are an affordable way to house your seedlings, though not the most attractive. You may wish to use plastic or ceramic pots - which is also ok. We like to plant into smaller bags and then plant on to 20 litre bags for their final growing in a few months time. You may choose to go straight into a 20 litre container - and this is fine too.
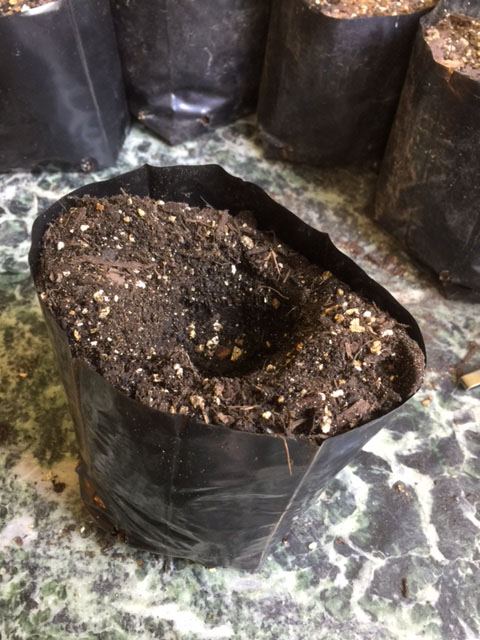
We pre-fill a whole load of bags with our previously made up Potting Medium Mix. Try and do this as soon as is possible as the potting soil is perfect when freshly made up and not so great to work with when it has dried out for a few days.

We germinate and grow our seedlings in Jiffy Pellets. Jiffy Pellets are super convenient self contained growing plugs made from coco peat. These are specially treated and buffered to offer your seedlings everything they require for the first 1 - 2 months of growth.
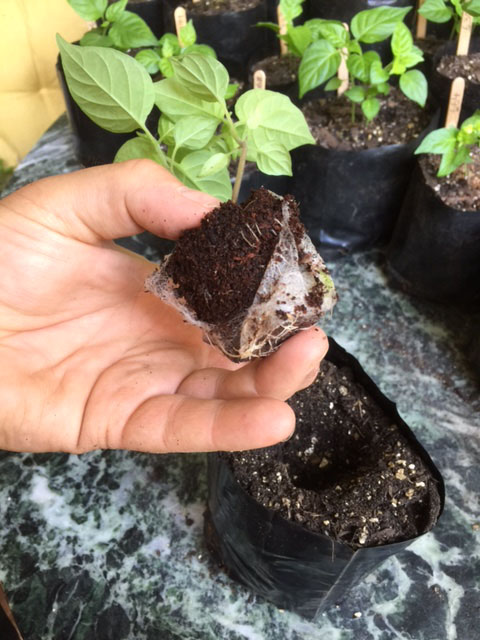
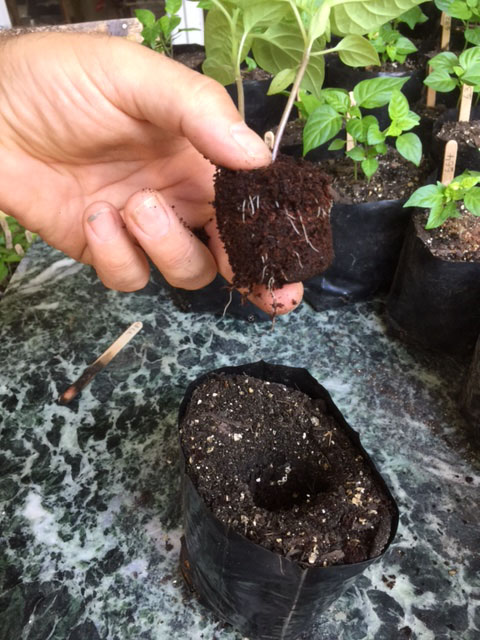
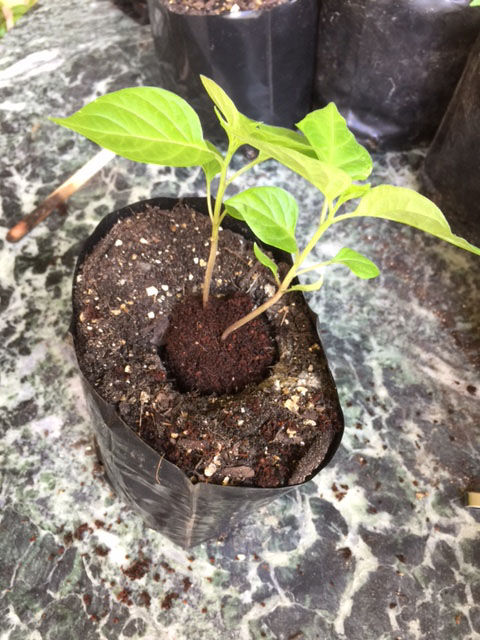
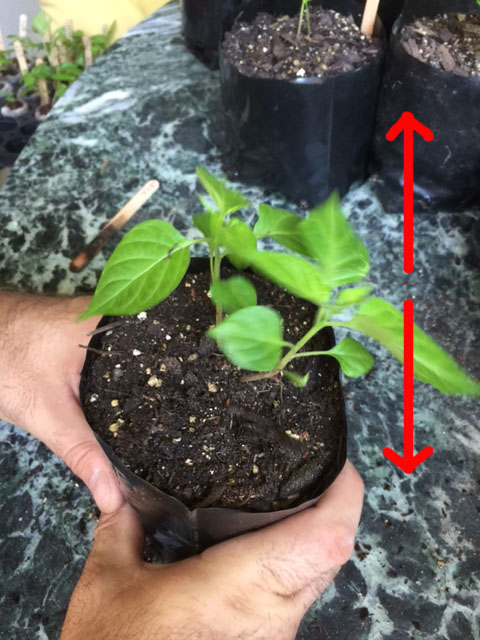
Once the roots of your seedling start growing through the outer muslin of the Jiffy Pellet, you can think about planting on your seedling. As can be seen from the image below, the seedling has roots growing through the mulsin and has at least two to three sets of true leaves. Planting on seedlings earlier than this means seedlings are still quite small and delicate. Their fragility can result in damaging the seedlings during handling and may ultimately result in the seedling dying. It is best to wait until seedlings are on their third or fourth set of true leaves. This means that the stems of your seedlings will be that much stronger and will tolerate being handled that much more.

As can be seen from the image below, Jiffy Pellets are very conducive to healthy root development.

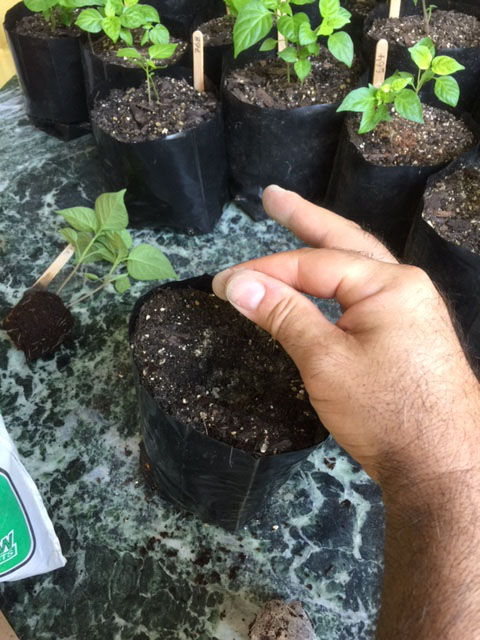
We will make a hole in the Potting Mix using two fingers on either hand. The hole should be big enough to accommodate your seedling's Jiffy plug. The width of two fingers (we find) makes a hole with the perfect width for a Jiffy plug.
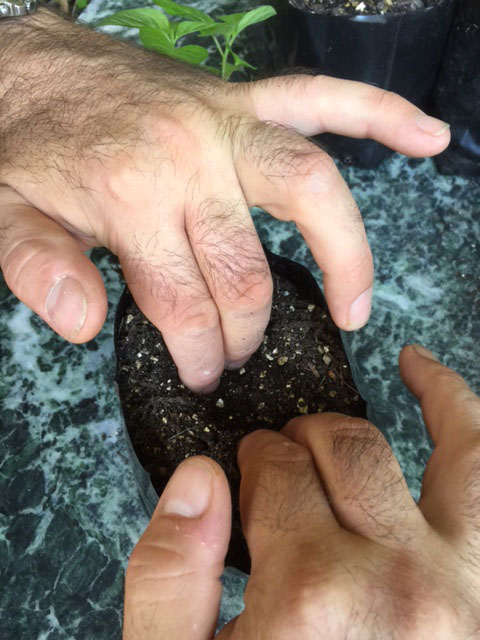
The hole should be deep enough to make the base of the seedling stems level with the potting medium in the container.
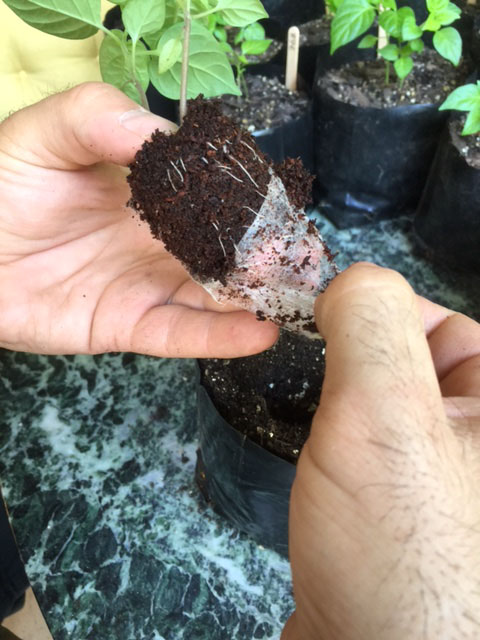
The muslin that goes around the pellets is (supposed to be) biodegradeable, but we have found that it is much better to remove the muslin when planting on. This is not difficult to do. It does take a little practice and sensitivity, but does not take long. In the long run, roots will develop at their own pace without obstruction - which is better.
Gently tear at the side wall of the muslin until the fabric has a tear from top to bottom.

Gently start peeling away the fabric from the sides of the plug. Some roots that have started poking through the material may break off, but this is ok. These roots will grow back.
If your plug is not wet enough, it may be a good idea to give the plug a little spray with water before unraveling the muslin. When the plug is too dry, the coco peat will crumble like sawdust in your hands and the root bowl will suffer more handling stress. So, if you notice that the coco peat is crumbling, just wet the medium a little.
It is also a great tip to gently hold the plug between the thumb and index finger as shown below (top and bottom of the plug). It is easier to peel of the muslin this way and the integrity of the coco peat is maintained. Like an egg, the plug is stronger when pressure is applied top to bottom than on the sides. The coco peat has a tendency to fall apart more when held at the sides.
Once the muslin has been removed, we will set the seedling aside to add some goodies into the hole that we will be planting into.
Our first secret ingredient is TurboGrow's Volcanic Rock Dust. This is super good and has lots of wonderful trace minerals. Just what those roots want to tap into.
Now remember, it's the novice grower instinct to want to rationalise that you will add more. Because more means my plants will grow faster and bigger - right? Wrong! Follow the instructions. More very often leads to less i.e. plants dying.
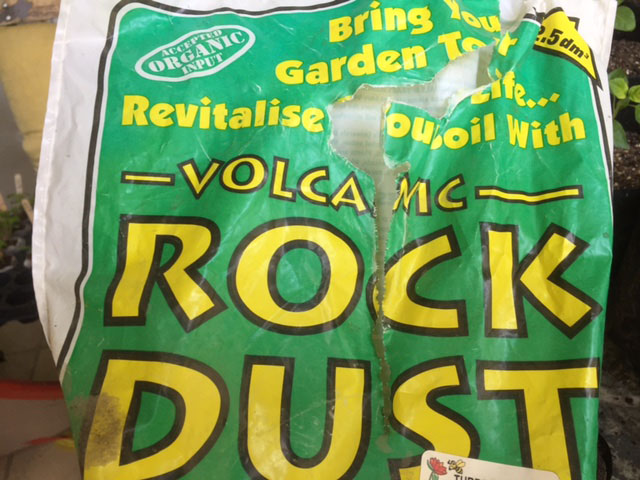
Just a pinch (1 tsp) of Volcanic Rock Dust will be enough. Try to dust the bottom and sides of the hole with this. We don't want large piles of it in the hole. It is best evenly distributed.
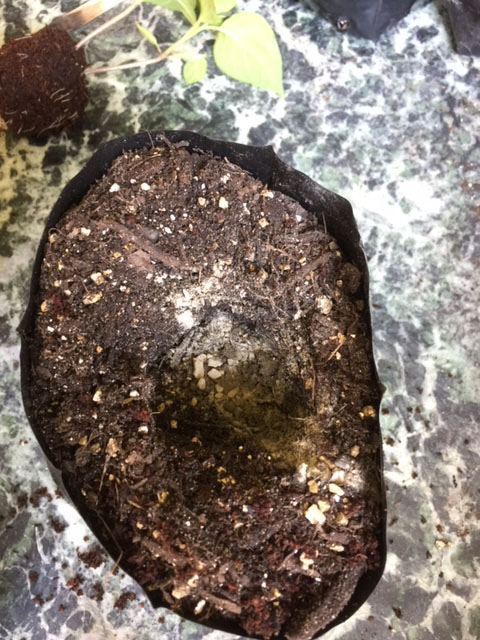
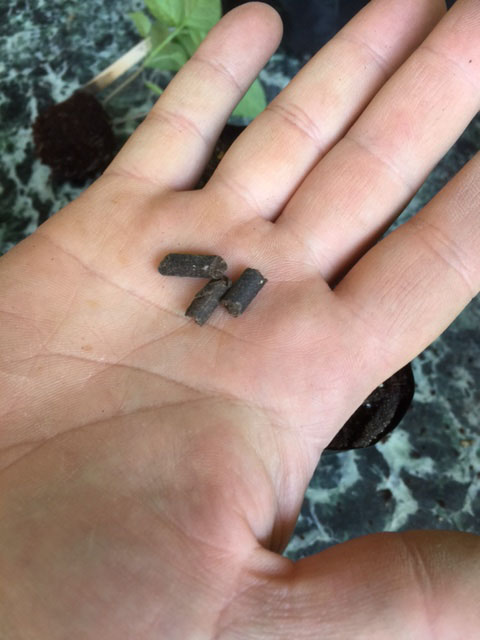
We add 3x Atlantic BioOcean pellets. That is all! No more!

Gently place seedling with it's coco peat plug into the hole.
Close up the hole and >> gently << firm down the surrounding soil. The soil should be at the level of the pellet, so the top of the pellet is just visible.

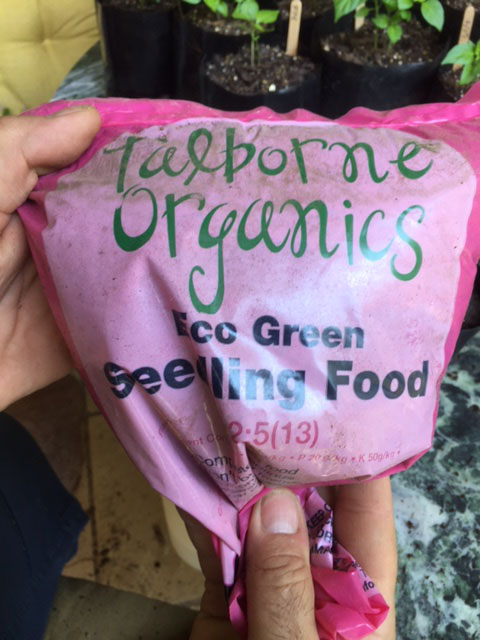
Talborne Organics make an awesome Seedling Food that gives these young seedlings a real boost. We sprinkle a large pinch (2 tsp) of this around the base of the seedlings.

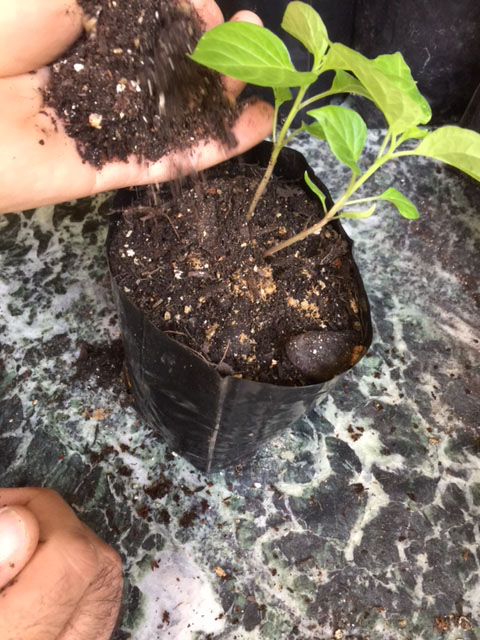
Once done, we get some more of the potting soil mix and sprinkle it over the just added Seedling Food, covering the soil level with a good 1 - 2cm of soil mix. We do this because we want this to be in the soil and not exposed to the sun and air and also because plant food is smelly stuff and attracts flies if not covered up.

Once the extra medium mix is nicely distributed over the base of the plant, gently firm down the soil again. Gently is the operative word. We do not want to compact the medium too much as it will make it more difficult for the little seedling to spread out it's roots and will also make the soil denser, which will effect the air pockets in the soil and the ability for excess water to drain off.

As a finishing detail, we hold the container firmly between both hands and gently tap it on the working surface / table. Maybe once or twice. This is a gentle way to firm down the soil without using our hands.
Remember to label as you go. We like to use Ice cream sticks with pencil markings. We find this to be both environmentally friendly and low cost. Wood is biodegradeable, so better than those plastic tags that can be purchased at nurseries. And remember, if you are going to use ink... only use quality permanent markers as ink will fade and wash out over time.

Now your seedling will enjoy a generous watering to replenish any water loss and to activate all those lovely supplements and ferts we added.
We recommend leaving your newly planted seedling out of the sun for a few days. Dappled sunlight is best. Your seedling, without a doubt, will need to overcome the stresses of having been transplanted, We don't want to add the stress of direct sunlight.
In a day or two, slowly start introducing your plant(s) to dappled light. At first for a few minutes, slowly increasing to longer durations and more direct sunlight. This can be done over two weeks or so and is called "hardening off". This time affords your plants time to toughen up and acclimatize to direct sunlight. Putting your delicate seedlings into direct sunlight is never a good idea as they will just shrivel up and die.

|
WATER |
*Please note that you are free to download and use this information for personal use only (not commercially) and while free, copyright laws do apply. This means you are allowed to download but all content and images remain the property of Chillihead and may not be disseminated or reproduced for financial gain in any way or manner what so ever.
There are no products to list in this category.
